How to build a pc :
Building Up a Gaming PC: A Complete Walkthrough
Building your own gaming PC is one of the most rewarding experiences for tech enthusiasts and gamers. Read complete page to know How To Build A PC. Not only you can customize every aspect of your rig, but you also get the satisfaction of assembling a powerhouse that fits your exact needs. This guide walks you through the process step by step, ensuring that even first-timers can achieve professional results.
Why Build a Gaming PC?
- Customization: Tailor your components to meet your gaming and productivity needs.
- Cost-Effectiveness: Often cheaper than buying a prebuilt system with similar specs.
- Performance Optimization: Handpick high-quality components for better performance and future upgrades.
- Educational Value: Learn how computers work and gain valuable troubleshooting skills.
- Aesthetic Appeal: Customize your PC case with RGB lighting and designs to match your style.
How To Build A PC –
“5steps on how to build a pc”
Step 1: Gather Your Components
Before building, ensure you have all the necessary parts. Each component plays a vital role in your PC’s performance and functionality:
- Processor (CPU): The brain of your PC. Popular options include Intel Core i5/i7/i9 or AMD Ryzen 5/7/9 series. Choose based on your gaming needs and budget. Higher-end CPUs like the Ryzen 9 7950X or Intel i9-13900K are great for gaming and streaming simultaneously.
- Graphics Card (GPU): Essential for gaming. Choices include NVIDIA GeForce RTX 4060/4080 or AMD Radeon RX 7000 series. Ensure compatibility with your monitor’s resolution and refresh rate. For 4K gaming, consider GPUs like the RTX 4090 or RX 7900 XTX.
- Motherboard: Acts as the central hub, connecting all components. Look for features like Wi-Fi, PCIe 4.0/5.0 support, and sufficient I/O ports. Ensure it’s compatible with your chosen CPU.
- RAM: At least 16GB DDR4/DDR5 is recommended for modern gaming. Opt for 32GB for future-proofing or heavy multitasking. Higher clock speeds (e.g., 6000MHz for DDR5) improve performance in memory-intensive tasks.
- Storage: SSDs (NVMe or SATA) for speed and HDDs for additional space. Consider at least 1TB SSD for gaming libraries. Newer Gen 4 NVMe SSDs provide blazing-fast load times.
- Power Supply Unit (PSU): Choose a reliable PSU with sufficient wattage (650W-850W) and an 80 PLUS certification. Modular PSUs help with cleaner builds.
- PC Case: Houses all components and provides airflow. Ensure compatibility with your motherboard size and cooling system. Cases with tempered glass panels allow you to showcase your build.
- Cooling System: Stock coolers are fine for entry-level builds. For advanced setups, consider aftermarket air or liquid cooling solutions. Custom water-cooling loops are ideal for enthusiasts.
- Peripherals: Monitor, keyboard, mouse, and headphones/speakers. High refresh rate monitors (e.g., 144Hz or 240Hz) improve gaming responsiveness.
- Operating System License: Windows, Linux, or other preferred OS. Windows 11 provides enhanced gaming features like AutoHDR and DirectStorage.
Step 2: Tools and Preparation
how to build a pc
Before diving into assembly, make sure you’re prepared:
- Tools Needed:
- Phillips-head screwdriver (#2)
- Anti-static wrist strap (optional but recommended to prevent damage to components)
- Zip ties or Velcro straps for cable management
- Flashlight for better visibility in tight spaces
- Workspace:
- Clean, well-lit, and spacious area to work
- Anti-static mat or hard surface
Pro Tip: Lay out all components and their manuals before starting. Familiarize yourself with each part to avoid mistakes during assembly. Keep small screws in a magnetic tray to prevent losing them.
Step 3: Building Your Gaming PC
Follow these steps carefully to assemble your rig:
- Prepare the Case:
- Remove side panels for easy access.
- Check for pre-installed standoffs in the motherboard tray; adjust if necessary. Clean the case interior to remove any factory dust.
- Install the Power Supply (PSU):
- Secure the PSU in its designated slot, usually at the bottom or rear of the case.
- Route the cables through the back panel for cleaner cable management. Leave some slack for adjustments.
- Install the Motherboard:
- Attach the I/O shield to the case if it’s separate.
- Align the motherboard with the standoffs and secure it using the screws provided. Double-check alignment with the I/O ports.
- Install the CPU:
- Open the CPU socket latch on the motherboard.
- Align the CPU’s gold triangle with the socket’s corner indicator and gently place it in.
- Close the latch and secure the CPU. Handle the CPU by its edges to avoid damaging pins or contacts.
- Install the RAM:
- Open the RAM slots on the motherboard.
- Align the notch on the RAM stick with the slot and press firmly until it clicks. For dual-channel setups, install RAM in the recommended slots (e.g., A2 and B2). Ensure compatibility with your motherboard’s QVL list.
- Attach Storage Drives:
- For NVMe SSDs, insert them into the M.2 slot and secure with a screw. Remove any protective coverings on thermal pads.
- For SATA SSDs or HDDs, mount them in the drive bays and connect SATA data and power cables. Use mounting brackets for secure placement.
- Install the GPU:
- Remove the necessary PCIe slot covers on the case.
- Insert the GPU into the top PCIe x16 slot and secure it with screws. Connect the PCIe power cables from the PSU. Ensure the GPU is level to prevent sagging.
- Connect Power Cables:
- Attach the 24-pin cable to the motherboard.
- Connect the 8-pin/6-pin cables to the CPU and GPU.
- Connect SATA power cables to drives. Use cable combs for better organization.
- Install Cooling Solutions:
- Mount the CPU cooler as per the instructions. Apply thermal paste if not pre-applied. Use a pea-sized amount for even coverage.
- Attach case fans, ensuring proper airflow (intake at the front/bottom, exhaust at the top/rear). Optimize fan curves in BIOS for quieter operation.
- Cable Management:
- Route and secure cables behind the motherboard tray using zip ties.
- Keep cables away from moving parts like fans. Use cable grommets for cleaner routing.
Step 4: Power On and Install Software
- Initial Boot:
- Connect your monitor and peripherals.
- Turn on the PC. If it doesn’t power on, recheck all connections and component seating. Look for error codes on the motherboard.
- BIOS Setup:
- Access BIOS (press DEL/F2 during boot).
- Set boot priority to your OS installation media.
- Enable XMP/DOCP for RAM speed optimization. Update BIOS to the latest version if needed.
- Install the Operating System:
- Use a bootable USB to install Windows, Linux, or another OS.
- Follow the installation steps and format drives as needed. Partition your drives for better organization.
- Install Drivers:
- Download GPU drivers, motherboard chipset drivers, and any other necessary software from official websites. Install utility software for RGB and fan control.
- Update the System:
- Ensure your OS and drivers are up to date for optimal performance and security. Disable unnecessary startup programs to improve boot times.
Step 5: Optimize Performance
- Overclocking:
- Overclock the CPU and GPU through BIOS or software for enhanced performance. Ensure proper cooling. Test stability using stress-testing tools like Prime95 or FurMark.
- Software Tools:
- Use monitoring tools like MSI Afterburner, HWMonitor, or CoreTemp to track system performance. Benchmark your PC using 3DMark or Cinebench.
- Game Settings:
- Adjust in-game settings for a balance between visuals and frame rates. Enable technologies like DLSS or FSR for improved performance.
- Regular Maintenance:
- Clean your PC every 6 months to prevent dust buildup. Reapply thermal paste if needed. Check for firmware updates for hardware components.
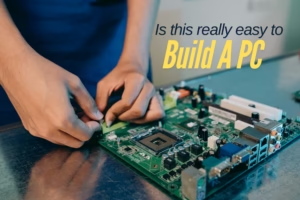
Is this really easy to build a pc?

Building a PC can be surprisingly straightforward, especially if you follow a step-by-step guide. Modern components are designed to be user-friendly, and many are built with features that make the assembly process intuitive. Here’s why building a PC can be easier than it seems:
Reasons Building a PC Is Manageable
- Plug-and-Play Design:
- Most components, such as the CPU, GPU, and RAM, are designed to fit only one way, reducing the chances of mistakes.
- Ports and connectors are often labeled for clarity.
- Resources Available:
- Guides like this one, video tutorials, and forums provide detailed assistance at every step.
- Manuals for individual components are helpful and provide clear instructions.
- Pre-Installed Features:
- Many modern cases come with pre-installed standoffs, cable routing channels, and labeled connections for ease of use.
- Stock CPU coolers often come with pre-applied thermal paste, saving you a step.
- Modular Assembly:
- Each component is installed individually, so you don’t have to deal with complex subsystems all at once.
- You can troubleshoot specific areas if something doesn’t work right away.
- Supportive Community:
- Online communities like Reddit (e.g., r/buildapc), YouTube, and specialized forums offer support for troubleshooting and tips.
Challenges You Might Face
That said, there are a few aspects that can feel tricky, especially for first-timers:
- Compatibility Concerns:
- Ensuring that your CPU, motherboard, and RAM are compatible requires some research. Tools like PCPartPicker simplify this.
- Cable Management:
- Keeping cables tidy can take extra effort and planning.
- Fear of Damaging Components:
- Components like CPUs and GPUs are robust under normal conditions but can be damaged by mishandling or static electricity.
- BIOS and Software Setup:
- Accessing and configuring BIOS settings, installing drivers, and optimizing performance can require some learning.
How to Make It Easier
- Start Simple: Begin with a mid-range build; avoid complex cooling systems or extreme overclocking setups.
- Plan Ahead: Use PCPartPicker to confirm compatibility and avoid surprises.
- Take Your Time: There’s no need to rush. Double-check each step as you go.
- Seek Help When Needed: Watch tutorials or ask for advice in online communities.
In summary, building a PC is not difficult if you approach it with patience, preparation, and a good guide. The process is rewarding and teaches you valuable skills that can save money and empower you to upgrade or troubleshoot your system in the future.
FAQs and Troubleshooting on how to build a pc :
- PC Won’t Boot:
- Check power cables and ensure all components are properly seated.
- Look for diagnostic LEDs or beeps on the motherboard. Refer to the manual for error codes.
- Overheating Issues:
- Improve airflow by adjusting fan placement or upgrading cooling solutions.
- Check thermal paste application. Ensure there’s no obstruction in the air pathways.
- No Display Output:
- Ensure the monitor is connected to the GPU, not the motherboard.
- Test with a different cable or monitor. Update GPU firmware if available.
Building your own gaming PC is an exciting journey that empowers you to create a machine tailored to your needs. With proper care, upgrades, and maintenance, your PC can deliver years of high-performance gaming and productivity. Enjoy the process, and welcome to the world of PC building! thank you for reading all the information now you know how to build a pc.


